I had intended to create 4 different sizes of the Munchkin Rumps Bloomers Pattern (toddler - pre-teen) and maybe change the gusset a bit before releasing this as a new pattern. However, I've decided that the modifications are not significantly different enough to warrant having two separate patterns. Instead, the Munchkin Rumps Universal Soaker (xls) pattern will absorb the gusset variation. And with the customization page, anyone can make a size for an older child...plus the bloomers leg style is already integrated into it.
The MRUSP will still be available through my etsy shop at www.munchkinknitworks.etsy.com
Furthermore, there will be NO CHANGE IN THE PURCHASE PRICE.
I probably won't get to this for another week or so...gotta finish up Christmas celebrations :)
Tuesday, December 30, 2008
Wednesday, November 26, 2008
My Wollmeise Antidote
So I tried it again...dyeing some sock yarn to closely resemble "Poison No. 5" from the Wollmeise.
I layered the colors in a different order and even used some different colors but as I was hand painting, I was disappointed that it seemed like I'd come up with nearly the same colors. So I decided to add a bit more here and there to make it closer to colors that I'd really enjoy...since I wasn't matching what I was attempting.
I thought that was the end of it. I'd be done trying this colorway...a bit disappointed, but done. The bright side = I'd have some nice colored yarn to make so socks with :)
Well, as I was squeezing out the water, the colors were perking up a bit. It's funny that in fluorescent l lighting, it has a neon glow too. It's drying right now and I'm hopeful that it will actually be closer to what I wanted than I thought...fingers crossed
Will post pics when done.
Dyeing details:
Magenta (on 35g)= 1/2 packet Strawberry KA, 1/4 packet Berry Blue KA, one dye bath of 21 drops neon pink gel color & 7 drops neon purple gel color, second dyebath of 10 drops neon pink & 10 drops neon purple.
Purple (on 35g)= 1/2 packet Strawberry KA, 1 packet Berry Blue KA, one dye bath of 15 drops neon pink gel
color & 15 drops neon purple gel color.
Purple/Black (on 35g)= 3 packets Blackberry KA, 1 packet Switchin' Secret KA, 1.75 packets Berry Blue KA.
I did the magenta & purple sections first (exhausting the dye baths at room temp since it's superwash yarn). However, the purple/black section had to be left to exhaust overnight. The next morning I cooked it all on "high" in the crockpot (with exhausted dye bath/acidic water) for 2 hours. Then rinsed & dried.
Update: 11/28/08
Well, it's all dry. The colors were very similar to the first attempt (here's a link to that blog post)...but I liked the second one better...not enough blue in the first one. So I overdyed the first one in a bath of 2 packets Invisible Kool-Aid, 15 drops blue gel color, & 5 drops neon purple gel color.
Here's the overdyed first attempt...

Here's a pic that best shows all three colors in the second attempt.

Here they are side by side.

I think this colorway is out of my system. I'm very pleased with my results. Now I just need to figure out which I like better for my socks & what to do with the other...decisions, decisions :)
Sunday, November 16, 2008
Pick Your Poison No. 5
A few months back I ran across this yarn...Wollmeise Poison No. 5 and I thought it was the most beautiful yarn I'd ever seen! Here's a link to my favorite pic of the dark intensity.
But seeing as how the yarn sells out almost immediately and the second-hand selling price is $40-$45...I didn't think I'd ever be able to own it myself. Don't get me wrong...I did contemplate stalking the websites that sell it or buying it second hand but then I read something from someone who did that. She had stalked and got lucky enough to score a few colors but was now trying to resell them. She had come to the realization that although the colors are stunning, the yarn itself was not her favorite. And especially after reading her comment about the yarn not being super soft...I came to my senses about buying some. Because texture is VERY important to me...so began my quest to try to dye my own.
There are three color intensities of Poison No. 5 (light, medium, & dark). While they are all beautiful, I really wanted something close to the dark intensity. I think I ended up with something close to the medium intensity. And while my end colors my not have the "dark neon" quality of the Wollmeise, I am still extremely happy with what I got :D This is how I got there.
First I had to gather supplies & do some test runs. I've wanted to dye black with Kool-Aid from the very beginning and after acquiring a couple of discontinued flavors & a couple of experiments...I think I have it!
Here's a pic of my "Black" experiment from an earlier post.

Here are my "Poison" test dyes on Paton's Classic Merino.
Test #1

Test #2

Now, I was pretty confident that I had a good plan for getting the colors I wanted. So yesterday, I finally skeined off some BFL Ultra (superwash sock yarn) from Wool2Dye4. I was shooting for a 150g skein but when I got to 109g, I was a little dissappointed to find a knot in my cone of yarn :( But I figured it should be enough for what I needed. I usually don't use superwash yarn, but the great thing about it is that it is incredibly easy to hand paint because you can get all the color into the yarn while it's still cool.
Here are my ingredients, proportions & some pics.
1st Stop: Neon Pastels
Food coloring gel was melted & mixed in ~2 oz of water, then diluted to ~12 oz of cool water before dipping yarn in.
Pink (on 25g):
17 drops of Neon Pink Betty Crocker food color gel
4 drops of Neon Purple Betty Crocker food color gel
1 packet Invisible Kool-Aid
Purple (on 50g):
20 drops of Neon Pink Betty Crocker food color gel
20 drops of Neon Purple Betty Crocker food color gel
1 packet Invisible Kool-Aid
plus leftover blue from dyeing the Black portion
Black (on 25g):
2 packets Blackberry Ghoul Aid
1 packet Switchin' Secret
1 packet Berry Blue
4 drops of Neon Pink Betty Crocker food color gel
4 drops of Neon Purple Betty Crocker food color gel
After soaking in plain warm water for ~1hr, I rolled the skein in a towel & pressed as much water out as I could. The skein was divided in quarters (marked with acrylic yarn) with one section to be pink, 2 sections to be purple, and 1 section black.
I dyed the black section first using only the Kool Aid portions. The color took a lot longer to soak up with this yarn than with the superwash Knit Picks Bare that I've used before & I took it out of the water when it was still a bit blue...saving the blue.
The pink & purple dyebaths were not mixed with any acid. Instead I mixed a minimal amount of water (3 oz per 25g) & 2 packets of Invisible Kool Aid together & applied it only to the 75g of yarn that was designated as non-black. Next I dipped the pink section in the dyebath. Then did the same with the 2 purple sections (both at the same time). Next I dipped all except the pink into the leftover blue from the black dyebath. Finally, I overdyed the black section in the light neon mix I'd saved for just a hint of purple.
Here's the result...

Pretty...but just not what I was going for.
2nd Stop: Berry Tones
Ovedyed the above yarn with the following proportions. Packets were mixed in 8oz of water & added in 1 oz increments.
Pink (on 25g):
1/4 packet Black Cherry
3/8 packet Blackberry Ghoul Aid
Purple (on 50g):
5/8 packet Blackberry Ghoul Aid
Black: No change
Here's a pic...

Not there yet....
Final Stop: "Venom"
Next I overdyed with the following proportions.
Pink (on 25g): 1/4 packet Black Cherry
Purple (on 50g): 1 packet Blackberry Ghoul Aid
Black: No change
Here's a pic...

All these pictures were taken when the yarn was wet so I expect things to lighten up a bit when it is all dry. I will add a dry pic sometime tomorrow.
11/17/08:
Pics of the skein dry...


Tuesday, November 4, 2008
October "Fast Forward"
Other things that happened last month...
Serena went to a classmate's 6th birthday party...at a nail salon.
She got a manicure & pedicure.

See the little gems on the pinkies? They were on her littlest toes too :)LOL

Grandma & Grandpa came to deliver pumpkins...and brought their dogs.

We wore them out :)LOL

Pumpkin carving/decorating


Serena finally wore the tights I made her

We also used them as part of her Halloween costume too.
Here's a pic with her "boyfriend" Tyler

Owen dressed up too.

And that was October...pheww!
Monday, November 3, 2008
I Finally Fixed My Kick Spindle!
Several months ago I purchased a Little Meggie kick spindle from Heavenly Handspinning.

I spun on it a few times but then started working on more projects and having less energy to get to this by thte end of the day.
I recently found a kick spindlers group on Raverly and started poking around to see how other people were doing with their kick spindles. I realized that a part of why I hadn't gone back to spin was because I didn't enjoy it like I thought I would. After I watched a video of someone using their Mother Marion & rewatched the Little Meggie videos on YouTube, I had an epiphany...my spindle wasn't spinning as well as it should!
So dh & I investigated...the first thing you can actually see in my pic above...the top whorl is resting on the support post creating friction. That was the first thing to move. Next, I realized that the bearing in the base wasn't actually spinning...so it was creating more friction for the spindle shaft instead of helping. And it was actually creating a groove in the shaft where it was rubbing against the stationary bearing. Part of the problem was that the spindle shaft and the bearing are not square to each other. You can also see from the pic below that the spindle shaft is a bit bowed (to the right)...which doesn't help the situation either.

DH popped the bearing out of the hole & found there that it wasn't drilled evenly so the bearing wasn't sitting square. He scraped out a bit of wood from the side of the hole & put the bearing back.
At this point, the spindle shaft got smoothed down & shoved back in the bearing...I thought it was fixed. And for a few spins, the bearing ran smoothly...then it began to "stick" again and grind away at the spindle shaft again >:(
Now began the experiments to keep the shaft & the bearing together. I tried a piece of paper towel...which worked for a while but the paper got worn down by the pressure. DH suggested adhesive...I REALLY did not want to do that! Next was modeling clay. Again it worked for a while but got smooshed out by the pressure. At this point, I was getting really frustrated. I considered other things like a cotton ball, a rubber band, duct tape, and electrical tape. Tape options were out cuz of the "goo factor" and I wasn't confident that the others would actually do the trick for the long term.
So the next attempt was air line tubing from dh's fish tank equipment. The only problem was it wasn't a large enough diameter to easily fit over the shaft tip. We both tried stretching it to no avail...so I cut it. I now had a flat piece of tubing and thought it couldn't hurt at least try it in the hole, right?
Here it is

It works GREAT now!! I've only had it pop out of place once (cuz I put too much upward pressure on the bottom whorl when giving it a spin with my hand). The most important thing is that the shaft & bearing have not broken free of each other once! I am so happy now :D I was able to get thru the rest of the 2oz of BFL/CorrieX I had started 4 months ago in just a matter of a few more sessions with it. Now I just have to find something to wind it off on so I can start the other 2oz.
SO happy now!
11/17/08: Update
The piece of tubing started breaking down so I took another stab at rearranging the components to get the spin going right. I think the major problem with the bearing is that the hole is not flat inside. Since I don't have the right tools to scrape it out, I remounted the bearing up & away from the bottom of the hole. The sides of the hole are tight enough that it is secure. And the best part is that when I inserted the shaft & spun it, the bearing seated itself into the right angle for a fabulously long spin!
Here's a pic...

Sunday, November 2, 2008
The "Spin In"
I went to a "Spin In" a few weeks ago (Oct 18th), held by the Bishop Hill Fiber Guild. I carpooled with my new "fiber friend," Heidi (who I met at our local famer's market).
She brought her wheel along

An Ashford Traveler.
So I could participate in the "Beginning Wheel Spinning" Workshop.
After ~1hr I had this much done

I also attended the "Sheep Breeds & Wool Uses" Workshop...loads of great info.
Of course, I made a couple purchases from Black Socks Sheep & Wool.
Two oz black CVM Lamb roving from "Emily"...I think.

And some of the first batch of yarn they had spun...
Five oz of aran wt taupe-colored CVM from "Sparrow"

Fast forward...I was able to go over to Heidi's to keep spinning the white corriedale & got ~ halfway thru the 2 oz.
Fast forward again to yesterday...I met up with Heidi at a craft show she was selling at & spun for almost another 3 hrs to FINALLY finish the 2oz.
DD watching me spin

It now looks like this...and took a total of about 7 hrs to spin.

It is REALLY fine. I think it's average fingering to lace weight...when plied...YIKES!
I'm spinning 4oz of worsted-aran weight gray on my kick spindle to ply with it....gotta find the time tho...
Saturday, November 1, 2008
Vacation!?
I am woefully behind at posting so I think I'll try to do one a day till I catch up.
Yes! We took a vacation! Just the four of us...to St. Louis.
I have a few pics now...With my normal camera "ca-poot" I had a loner digital that only held 11 pics & we picked up a couple disposables. I only just turned in the disposables for processing yesterday...so hope to get the CD's back Monday.
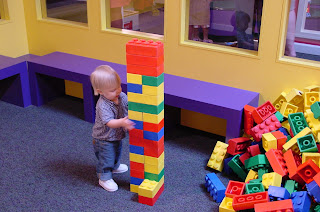
We went to the zoo...of course! Visited some family. And went to a kid "fun house" of sorts called The Magic House.
Here are some pics of the kids playing there.


Yes! We took a vacation! Just the four of us...to St. Louis.
I have a few pics now...With my normal camera "ca-poot" I had a loner digital that only held 11 pics & we picked up a couple disposables. I only just turned in the disposables for processing yesterday...so hope to get the CD's back Monday.
We went to the zoo...of course! Visited some family. And went to a kid "fun house" of sorts called The Magic House.
Here are some pics of the kids playing there.


Thursday, October 2, 2008
JD Green & Kool Black
If you are my father..stop reading and come back after Christmas!
If not, please continue on...as long as you promise not to tell my father what you learn here :)LOL
I want to make my dad some socks for Xmas so I asked for color preferences...with the intention of doing some Kool Aid dyeing. His came back as gray & John Deere green! How was I going to get that? Then I remembered that I got a really nice green when I mixed 5 Switchin' Secrets and 2 blues (IBRL).

So I happened to find a box of 72 packets of Switchin'Secret on ebay...since I was all out (it's discontinued and hard to find) so I bought it. It came just the other day & I finally got around to working on this.
I knew I wanted some dark regions...preferably black and from my experimenting with Blackberry Ghoul Aid (also discontinued and hard to find) I knew that the best way to get black from the dark purple was to add green...PERFECT!
I started mixing the colors today....Switchin' Secret & Berry Blue and noticed that I didn't have the opacity that I did in the first batch from June....what was wrong? OH YEAH! I used Ice Blue Raspberry Lemonade...NOT Berry Blue...RATS! I knew I didn't have any of that left so I added generic lemonade and got this... I was pretty happy :D I poured the Blackberry on the yarn where I wanted it, then dunked the whole skein in the dyepot of green. I horribly tangled the skeins as I squished it around but I didn't want to get any white spots since superwash sucks up color so fast!. Here's the results. It's cooking in the crock pot right now. I'm very happy. I just hope it knits up well.
Here's the details:
2 Skeins Knit Pick's Bare Superwash DK (100g each)

# packets of KA per skein
3 Blackberry
5 Switchin' Secret
2 Berry Blue
3 generic lemonade (not pictured)

Mixed 1 packet Blackberry in 3 oz of H2O. Apply to yarn. Repeat 2 times till coverage is thorough.

Mix Switchin' Secret, Berry Blue, & lemonade

Add yarn to green dye & squish.

Here are some interesting colors from mixing up the green:
4 packets Switchin' Secret

4 packets Switchin' Secret & 2 packets Berry Blue

Saturday, September 27, 2008
Knitting till it HURTS!
I've been knitting every day for several weeks now trying to get Christmas presents done. Shortly after I started, my left arm started tingling. I've been to the chiropractor & the massage therapist several times since it started & we were thinking it was a continuation of the issues I've been having from carrying Owen...well, I think it's something different.
Carpal Tunnel Syndrome...at the very least inflammation of the nerve involved in that syndrome.
So I'm taking a break...even tho the gifts aren't all done. I found one of my old braces from the last time I had neuritis (in college) & we'll see if it gets any better.
Wish me luck :) I still have 4-6 gifts to work on.
National Alpaca Farm Days
Went to check out both alpaca farms near us today seeing as this weekend was National Alpaca Farm Days. Both farms are really close to us...so it wasn't too taxing of a trip for the whole family.
The very friendly one at Freedom Farm Alpacas

Serena's fave: the 3 month old white cria at EDR Lamas.

Evidence of my stash-building addiction...from Freedom Farms.

The very friendly one at Freedom Farm Alpacas

Serena's fave: the 3 month old white cria at EDR Lamas.

Evidence of my stash-building addiction...from Freedom Farms.

Wednesday, September 3, 2008
YO! Stitch markers, Stay where I put you!
When I knit short rows, I like doing YO short rows as described by Mandie here. So much so that I linked to her page in my Munchkin Rumps Universal Soaker Pattern for any knitters who had not done short rows before. Well it was brought to my attention that it was a bit confusing how to do YO short rows at the marked stitches and still keep the marker in the right place.
Here are the options for turning at the indicated stitch in the Munchkin Rumps pattern...
Option #1: Use "wrap & turn" short rows. They do not interfere with the location of the stitch marker.
Option #2: You can move the stitch marker one more stitch away from center back, then do the turn at the stitch before the marker. That way the turn is in the appropriate place.
Option #3: You can work w/o markers & just watch for the second to last knit stitch before the side ribbing (like I do).
Option #4: Here’s the YO short row way with markers in place…my camera’s busted otherwise I would take pics. You’ll need markers that are bigger than your needles (not the same size).
Click on any picture to see it larger.
Mock soaker with center back in the middle & two stitch markers on either side.

Knit to first marker.

Pass marker to R needle & turn work around.

Move working yarn to back & purl into the marker & the next stitch.

Sorry for the blurry photo...
The green stitch marker is around the purled stitch.

Purl to the next marker.

Move marker to the R needle, turn work & wrap R needle clockwise.

Pass marker to the R needle & knit across.

The stitch with the marker around it should be on you L needle.
Lift it up & on to the L needle.

Knit 1, pass marker, K2tog.
Knit around till the next YO is the first stitch on the L needle (2 sts before the next marker).

SSK, pass marker, continue around till the next short row.
HTH :)
Here are the options for turning at the indicated stitch in the Munchkin Rumps pattern...
Option #1: Use "wrap & turn" short rows. They do not interfere with the location of the stitch marker.
Option #2: You can move the stitch marker one more stitch away from center back, then do the turn at the stitch before the marker. That way the turn is in the appropriate place.
Option #3: You can work w/o markers & just watch for the second to last knit stitch before the side ribbing (like I do).
Option #4: Here’s the YO short row way with markers in place…my camera’s busted otherwise I would take pics. You’ll need markers that are bigger than your needles (not the same size).
Knit to the 1st marker past center back.
Pass marker to RIGHT needle.
Turn work.
Move yarn to back for wrapping.
Insert needle purlwise into the marker AND the next st…Purl one st. You should now have a YO & a st with a marker around …that’s ok. (see note below)
Purl to the next marker.
Pass marker to the RIGHT needle.
Turn work.
Wrap RIGHT needle clockwise for the YO.
Pass marker to RIGHT needle.
Knit one st…you should now have a YO, a marker & a new st on the RIGHT needle.
Knit to the st that has the first marker around it. With this st on the LEFT needle, lift the marker back onto the LEFT needle.
Knit 1, pass marker, K2tog.
Continue around until the st before the next YO.
SSK, pass marker, knit…
NOTE: If you pass the marker to the RIGHT, then purl, you run the risk of the marker slipping beyond the wrap to the wrong position.
Click on any picture to see it larger.
Mock soaker with center back in the middle & two stitch markers on either side.

Knit to first marker.

Pass marker to R needle & turn work around.

Move working yarn to back & purl into the marker & the next stitch.

Sorry for the blurry photo...
The green stitch marker is around the purled stitch.

Purl to the next marker.

Move marker to the R needle, turn work & wrap R needle clockwise.

Pass marker to the R needle & knit across.

The stitch with the marker around it should be on you L needle.
Lift it up & on to the L needle.

Knit 1, pass marker, K2tog.
Knit around till the next YO is the first stitch on the L needle (2 sts before the next marker).

SSK, pass marker, continue around till the next short row.
HTH :)
Subscribe to:
Posts (Atom)
